
At some point, no matter whether you’re a novice gift wrapper or a packaging master, you’re bound to find yourself short of paper or facing a box that’s bigger than any roll could cover. That’s where this stylish colour-block gift wrapping technique can be useful.
By combining two pieces of wrapping paper, you can extend the width of a sheet up to the size you need. But instead of it looking like “I didn’t have enough paper,” the use of two different colours and the addition of a feature tape makes the wrapping job look stylish and purposeful — you meant it to be like this!
Plus, colour blocking — besides being on-trend design wise — is a great way to use up all those extra leftover pieces of wrapping paper that you can’t do much else with.
When choosing which papers to combine, select colours and patterns that complement each other and the Scotch™ Expressions™ Washi Tape that you’re using. Having trouble? Start with your favourite Washi tape and use papers in the same palette.
 SPONSORED CONTENT This post is brought to you by 3M Scotch® Brand. Visit the Scotch® Brand Style Blog for more information and great DIY inspiration!
SKILL LEVEL: Easy
TIME NEEDED: Approximately 5–15 minutes

SCOTCH® BRAND SUPPLIES:
+ Scotch™ Precision Ultra Edge Scissors
+ Scotch™ Expressions™ Washi Tape, Pine Trees
+ Scotch® Permanent Double Sided Tape
OTHER SUPPLIES/TOOLS:
+ Two different wrapping papers: Edo paper in Aqua and gift wrap in Peacock from The Paper Place.
+ Ribbon
+ Gift tag

1. Attach the two papers together. Lay the two sheets of wrapping paper facedown beside each other, overlapping an inch or so along one edge. Tape them in place with several pieces of Scotch® Magic™ Tape along the seam. It’s best to use the straight, uncut edge of the paper to get the cleanest look.
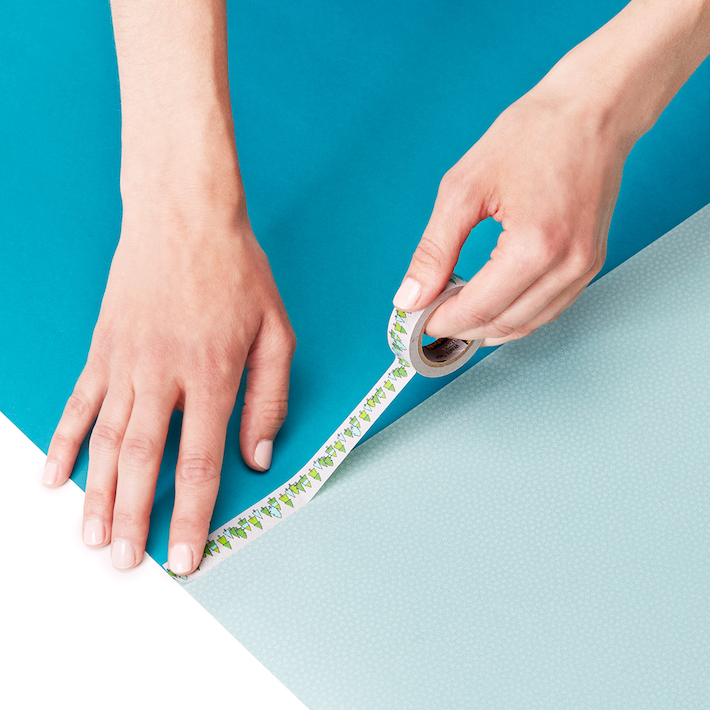
2. Add the Washi tape. Flip the paper over so it’s face up. Apply a strip of Scotch™ Expressions™ Washi Tape, Pine Trees, along the seam, taking care to keep the tape smooth and straight.

3. Wrap your box. Using your Scotch™ Precision Ultra Edge Scissors and Scotch® Permanent Double Sided Tape, wrap your gift. Before measuring and cutting the two-paper wrap, plan the placement of the Washi tape; I wanted mine about a third up from the bottom of the box, and parallel to the edge. Once you’ve wrapped the paper around the box, add a ribbon and gift tag to complete the look.
EXPERT TIP: There’s no limit to how many pieces of paper you can combine using this technique. Tape together two sheets for a clean colour-blocking look as seen here, or attach many smaller pieces together for a “quilt” of papers.

