This post was first published in Corinna’s monthly Gift Wrapping Newsletter. Sign up here!
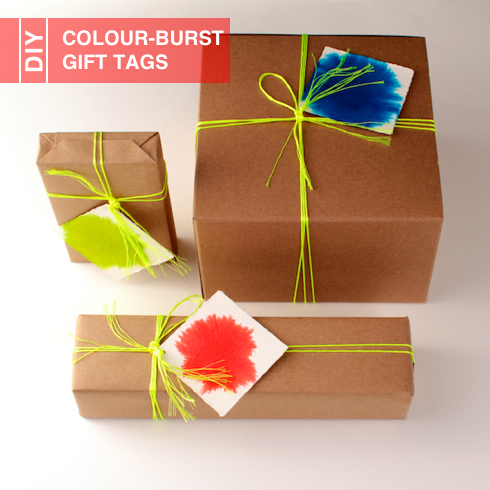
When you’re dying Easter eggs this year, why not whip up a batch of these vibrant gift tags at the same time? The intense hues come not from paint, but food colouring; when a drop of the dye hits wet paper, it “bursts” into a feather-edged circle, creating an exuberant base for cheerful messages.
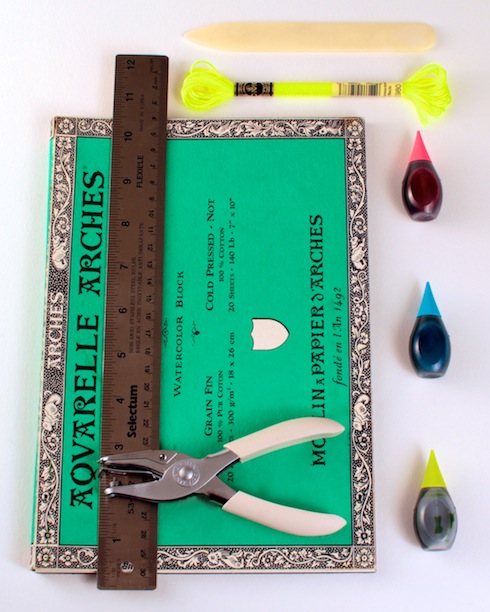
Materials + Tools
- Watercolour paper
- Ruler
- Bone folder
- Paper towel
- Food colouring
- Hole punch
- String or thin ribbon
How To
- To create a deckle edge for the tags, score, fold and tear the paper instead of cutting it. Measure out the size of gift tag you would like on the watercolour paper, marking a few points lightly in pencil. Next, score along these lines with a bone folder. I skipped the measuring step by using the grid on my cutting mat as a guide for scoring, making my tags 2 ⅜” square. Fold the paper back and forth both ways along the score marks, using the bone folder to make crisp creases. Tear carefully along the folds. To allow yourself extras for mistakes, make more tags than the final number you want.
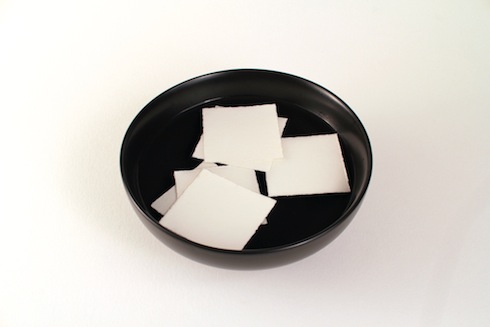
- Soak the torn paper pieces in a bowl of water for 2 to 10 minutes.
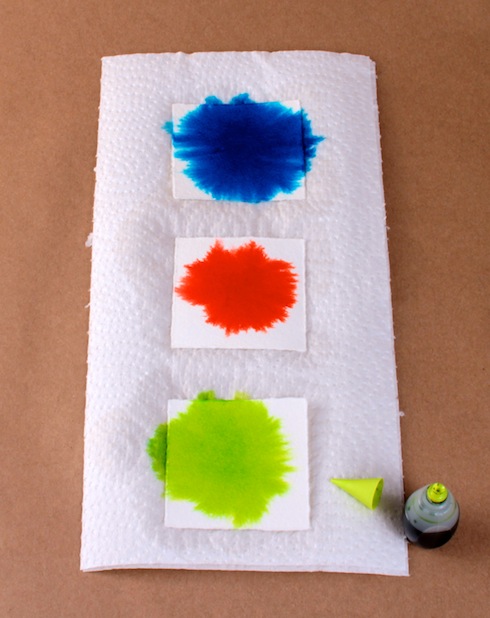
- Remove a square from the water and place on a piece of paper towel or clean rag. This will soak up excess water. Squeeze a single drop of food colouring into the centre of the tag; the colour should “burst” and spread into a feather-edged circle, slowly growing as the tag dries. Be sure to protect your surface so the dye doesn’t ruin it. If you get dye on your fingers, use tweezers to remove the paper from the water so as not to get the paper dirty. Set tag aside to dry. Repeat for each tag.
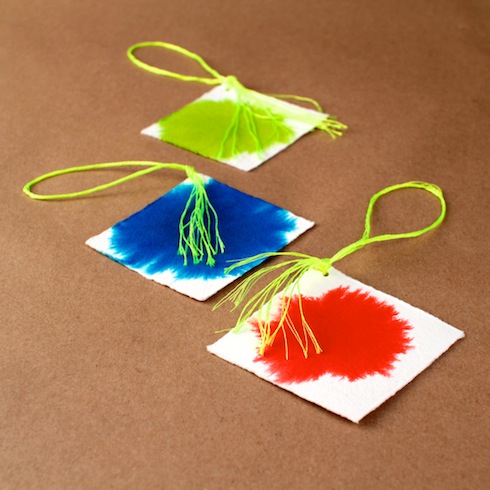
- Once tags are dried, punch a hole into one corner and thread a coordinating string or thin ribbon through and tie to the tag. I used a 1/16” punch to make a smaller hole, but a standard punch will also do. For the string, I went with a fluorescent embroidery floss (DMC E980) and frayed the ends for an extra fun touch.
- Finally, write a message on your tag — I found metallic gel pens work best — then attach to a present and give!

so cute! love the pop of color!
Thanks! The food colouring really is intense!
Fantastic! I just need to find an alternative for the food colouring (they’re not as bright here in Austria but more dilluted so the effect would look different…) – will ask in the craft store tomorrow!
Thanks! Maybe try calligraphy ink or a drawing ink like Winsor & Newton’s (or a similar brand). I haven’t tried either myself, but the colour intensity and liquidness of the inks make me think they would likely work. Try an eye dropper for dropping a dot of ink onto the paper.
really pretty. I linked to you in my blog, hope thats ok. http://crafterlifebyme.blogspot.se/2012/10/the-christmas-series-2-wrapping.html
love, Isabella
Of, course! Thank you for including me, Isabella
Pingback: From the Archives: 3 DIY Easter Projects | Corinna Wraps
Pingback: Blog Anniversary! Top 5 Posts of All Time | Corinna Wraps
Pingback: Monday Morning Gift | Corinna Wraps
Pingback: 5 Colourful Ways to Wrap Presents | Corinna Wraps