
Sometimes, putting in some extra time and effort is worth it. Like with this impressive art deco–style gift box: it’s a DIY project, but it looks almost like it’s been store-bought! And it’s a definite keeper. After getting a gift in this box, one could use it for organizing or pretty storage.
I have to admit, when I set out to create this gift box makeover, I don’t think I quite appreciated how much care and patience doing a detailed pattern like this can take. But I’m totally in love with the results!
If an intricate pattern like this isn’t your thing, however, you can achieve a similar look with a simpler design that’s easier and doesn’t take as long to create. For example, continue the stripes seen here on the box bottom on the lid as well, or try a “confetti” pattern of triangles or squares.
 SPONSORED CONTENT This post is brought to you by 3M Scotch® Brand. Visit the Scotch® Brand Style Blog for more information and great DIY inspiration!
SKILL LEVEL: Difficult
TIME NEEDED: Approximately 3 hours
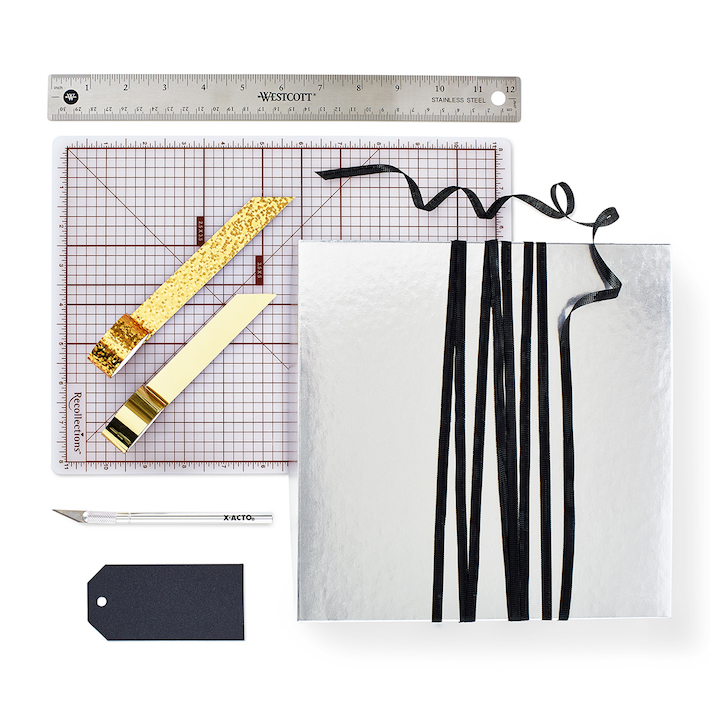
SCOTCH® BRAND SUPPLIES:
+ Scotch™ Expressions™ Metallic Tape, Gold Crinkles
+ Scotch™ Expressions™ Metallic Tape, Gold
OTHER SUPPLIES/TOOLS:
+ Gift box
+ Craft knife
+ Ruler
+ Cutting mat with diagonal guidelines
+ Ribbon
+ Gift tag
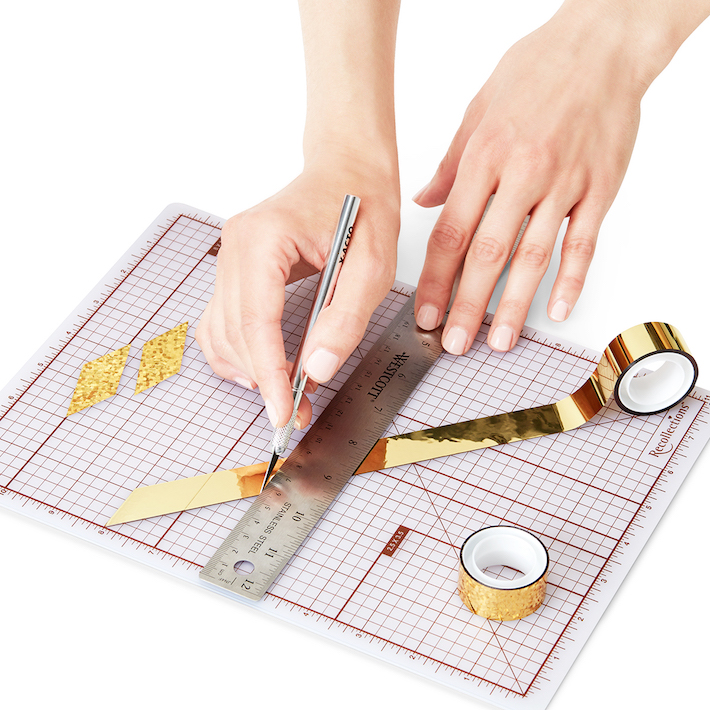
1. Measure and cut the tape for the lid. Apply Scotch™ Expressions™ Metallic Tape, Gold Crinkles, to your cutting mat on a 45-degree angle (use the diagonal guideline on the mat). Following the vertical guidelines, use a ruler and craft knife to cut one-inch strips, peeling them off the mat and setting aside as you go. Repeat with Scotch® Expressions Metallic Tape, Gold, with the diagonal in the opposite direction. For this nine-inch box, I cut approximately 42 strips of each tape.
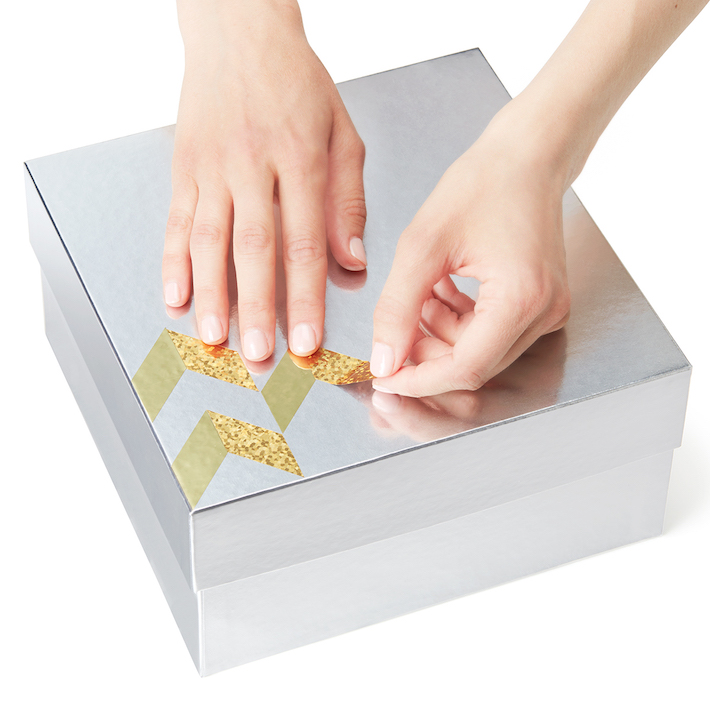
2. Apply tape to the lid. Starting from the top right corner, apply the first piece of Scotch™ Expressions™ Metallic Tape, Gold, to the lid of the gift box. Make sure the sides of your tape piece are perfectly straight. Then place a piece of Scotch™ Expressions™ Metallic Tape, Gold Crinkles, next to your first piece to create a chevron. The left edge of this first chevron is the “spine” along which you will align the first two columns of chevrons. (If you have trouble keeping the tape pieces straight, you can etch a light guideline onto the box using a pencil.)
Beneath the left edge of the first chevron, align a second piece of Scotch™ Expressions™ Metallic Tape, Gold, to the left of the “spine,” following beneath that with a second piece of Scotch™ Expressions™ Metallic Tape, Gold Crinkles, to the right of the spine. Complete the second and third chevrons with the second piece of tape for each, being sure to keep all edges straight.
Continue building the first two columns of chevrons, working your way down the “spine.” Repeat the steps, building chevrons across and down the top of the lid, then over each of its sides.
Take care to work slowly and ensure all your pieces are applied straight.
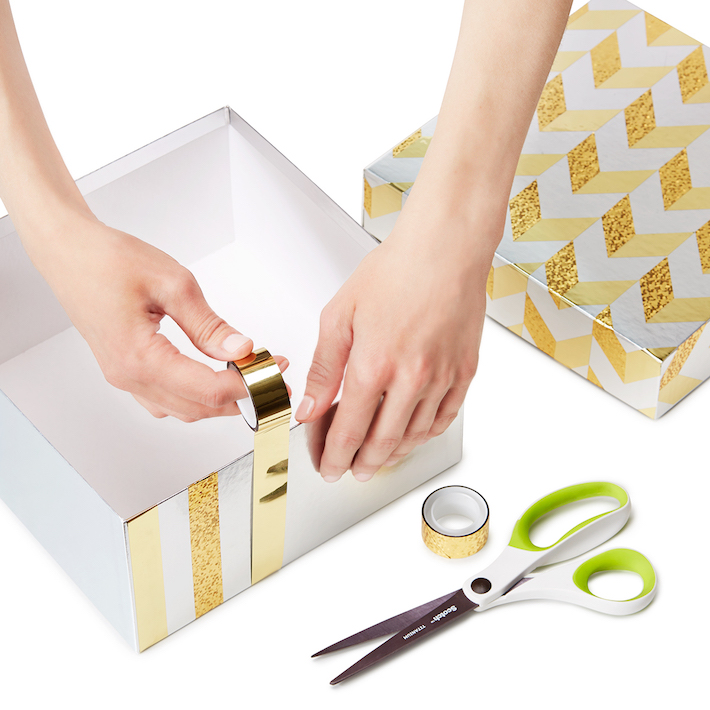
3. Apply tape to the box bottom. For the bottom of the box, apply strips of Scotch™ Expressions™ Metallic Tape, Gold, and Scotch™ Expressions™ Metallic Tape, Gold Crinkles. Alternate between the two tapes, leaving space for the box to show between each strip. (I used the rolls of tape as spacers, to keep things even.)
4. Add the finishing touches. After you’ve placed your gift inside (protected with layers of tissue paper), tie a ribbon around the box and add a gift tag.
EXPERT TIP: Choose a plain gift box that’s a nice colour to coordinate with your choice of tapes. If your box has graphics or writing on it, first cover the entire surface with a complementary tape before beginning your pattern.


This looks incredible! I am awful at wrapping gifts 🙂 x